
Thermal paste is an often-overlooked element of building a PC (often because it’s not as exciting as some of the expensive components), but it can be one of the most important elements for keeping your CPU cool and functioning correctly.
The thermal paste fills imperfections that are quite easily missed and prevents air bubbles left between the CPU and cooler or heatsink. These air bubbles can prevent the CPU from properly cooling and can damage the hardware, so it's important that you use a high-quality thermal paste to mitigate these risks.
Does thermal paste need to be replaced?
In short, yes. Thermal paste does need to be replaced. If like many, you’ve ever owned a prebuild, you’ve likely seen the pain of a slowing and ageing system. Thermal paste is very important to try and prevent this, which is why those with both newer and older systems should be aware of how to replace it.
Consider your thermal paste in the same way you would view oil in your car. It needs to be regularly replaced to keep everything operating smoothly.
Thermal paste will degrade over time. Sure, you can choose high-quality thermal paste for a longer-lasting solution, but the heat from the CPU will dry out the thermal paste over time and cause it to degrade eventually.
The longer you allow your thermal paste to degrade, the less efficiently it will transfer heat, and this will eventually impact performance.
How often should you change thermal paste?
The regularity with which you should change your thermal paste very much depends on how you use your PC and the quality of both the paste itself and the quality of the PC components. For lower quality thermal pastes and regular, demanding PC use, you could find you need to change the thermal paste every couple of months. If your use is easier going and you’re using quality pastes, you should only need to change it every couple of years. In general, changing thermal paste every one to two years is a good idea.
However, we would not recommend relying solely on timeframes to monitor when you need to change your thermal paste. Often, usage can change. Alongside all of the other contributing factors that can impact heat transfer efficiency, monitoring the CPU temperature, performance, or appearance of the thermal paste can be a much more effective measure of its efficiency and condition.
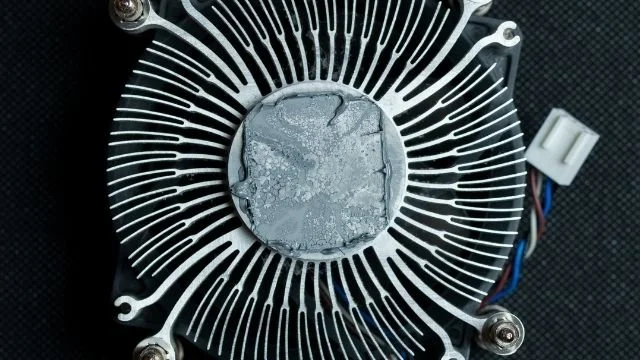
Thermal paste that looks cracked, dry or generally stiff should be changed. Changing your thermal paste is fairly simple, and there are easy ways to remove and replace your existing application. Oil bleeding or dripping can also be a fairly sound visual indicator that it’s time for a change.
If the idle temperature of your CPU is abnormally high, this can also be an indicator that the paste has lost its heat transfer efficiency and needs to be swapped for a fresh application of paste. The acceptable temperature of a CPU varies but is considered to be around 65 to 80 degrees Celsius (or 150 to 175 degrees Fahrenheit) when running fairly low-intensity apps. (Learn more about How to check CPU temperature and why is it important?)
Why does thermal paste go bad on CPU and GPU?
There are a number of reasons that thermal paste will go bad.
Of course, the most common is the natural impact of time. It’s not unusual for components to degrade over time and with regular use, and thermal paste is no exception. Thermal paste degrades over time because the heat generated by CPU gradually dries the solvent inside thermal paste. Once the solvent is gone, thermal paste will crack or powderize, losing thermal transferability.
What about the thermal paste that hasn’t been applied? High-quality thermal paste still in the tube should last a while, providing you have properly reapplied the cap and ensured that it is not exposed to elements that would compromise its form, like moisture or heat. (Learn more about Does thermal paste expire in tube? From practical and technical view points)
Of course, if you are regularly removing the heatsink, you could find that you have to reapply your thermal paste more often, in which case, you might have to purchase it more regularly. Luckily, it’s pretty affordable for such an important part of the maintenance process.
What might shorten your thermal paste lifespan?
There are several things that can impact the lifespan of your thermal paste. Most of these come down to different forms of intensity that will impact the degradation of the paste.
PC use that is highly demanding on the CPU is one of the biggest things that can impact the rate at which the paste degrades. Think of it in terms of temperature. Intense activity will create heat and therefore put more pressure on the heat-conducting qualities of a thermal paste. You can further impact the effect of temperature on the lifespan of your thermal paste by placing your PC in direct sunlight or another place that is directly affected by heat.
Quality also plays a big part in the lifespan and efficiency of your thermal paste. Poor quality pastes will not be as long-lasting as higher quality alternatives and will need changing more regularly.
The actual build of your PC, paired with these other things can make a huge difference to the lifespan of your thermal paste. The airflow through a PC build can influence the overall temperature and therefore be more demanding on the paste. The quality of your heatsink or cooler will also massively impact the thermal paste. The “harder the paste needs to work” to make up for shortfallings of poorer quality elements, the shorter its lifespan will be.
How to reapply thermal paste
Thermal paste is fairly easy to apply. If you notice a dip in performance and have decided to replace your paste, you can check out our step-by-step guide. Here are the key takeaways.
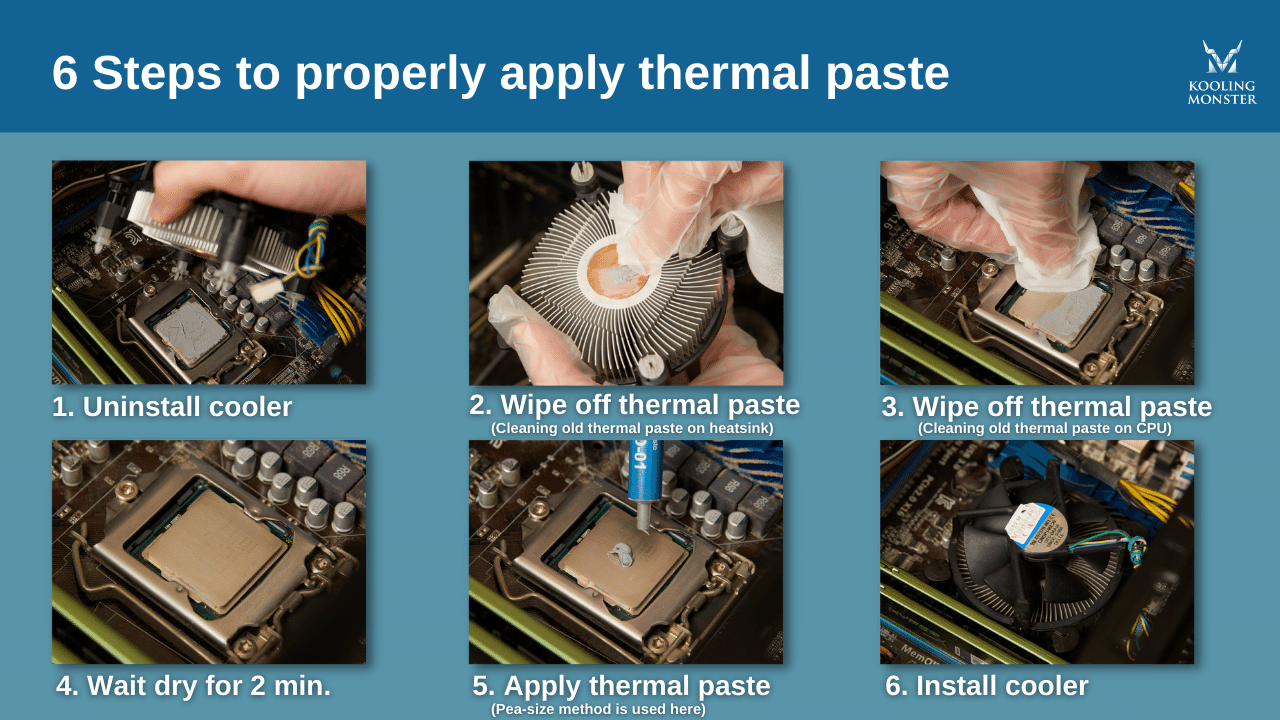
Step 1: Remove your cooler
Step 2 & 3: Use the KLEAN-01 thermal paste removal kit or a good, old-fashioned alcohol + cotton swab combo to remove the previous thermal paste application. You should clean any paste from both your heatsink and CPU.
Step 4: Allow both surfaces a couple of minutes to dry.
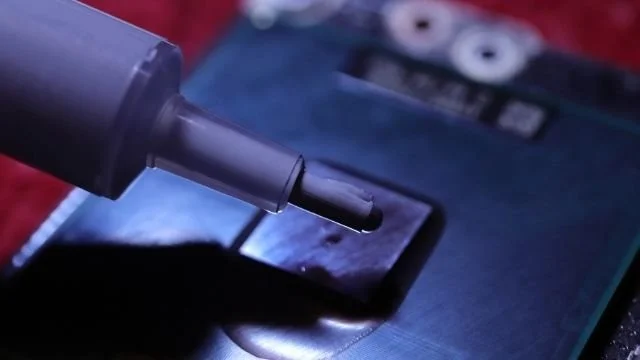
Step 5: Apply a small amount of thermal paste (approximately a pea-sized amount) to the CPU (other patterns are also OK).
Step 6: Reapply your heatsink and fix any screws. Keep an eye out for spillages where the heatsink meets the IHS. Just carefully wipe off any leaking or spilling excess with a thermal paste wipe or paper towel.
So, now that you are armed with the knowledge, you can ensure that you are correctly using thermal paste and are able to identify when yours needs replacing. All that’s left is to get your hands on a high-quality paste, like our KOLD-01 paste, to ensure that when the time comes, you have everything you need to get the job done quickly and easily.
![How to Apply Thermal Paste to a CPU? [2026 Step-by-Step Beginner Guide]](/_next/image?url=%2Fimages%2Fscraped%2F7f0f852b1856.webp&w=3840&q=75)
