
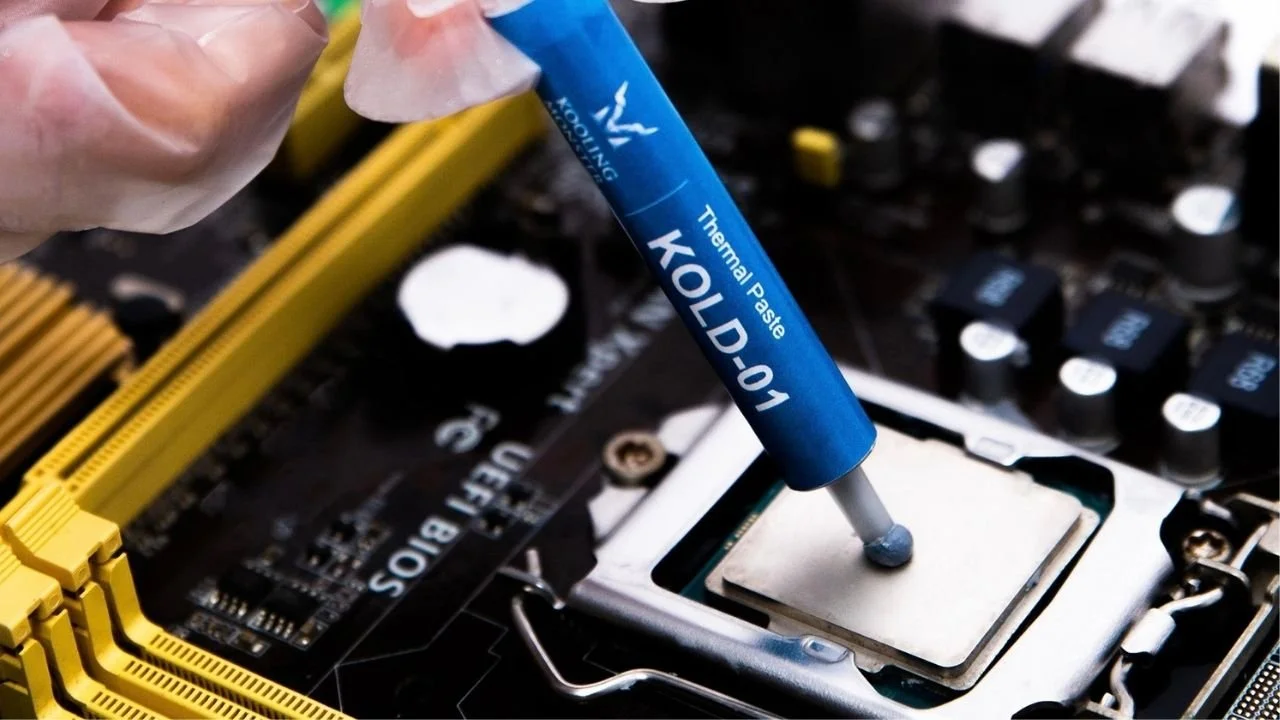
Most of the time, our first introduction to thermal paste is taking apart a pre-build or laptop. And when we see a tub of dried thermal paste oozing out of a processor, our first question probably isn’t “gee I wonder how that got there”.
And if you didn’t start on a prebuild, well… you’re one of the lucky ones. Whether you’re a beginner, wondering about the basic techniques to applying probably the most critical substance in a build, or a seasoned professional looking for new patterns, tricks, and insights, you’ll find what you need in this guide.
Different thermal paste patterns
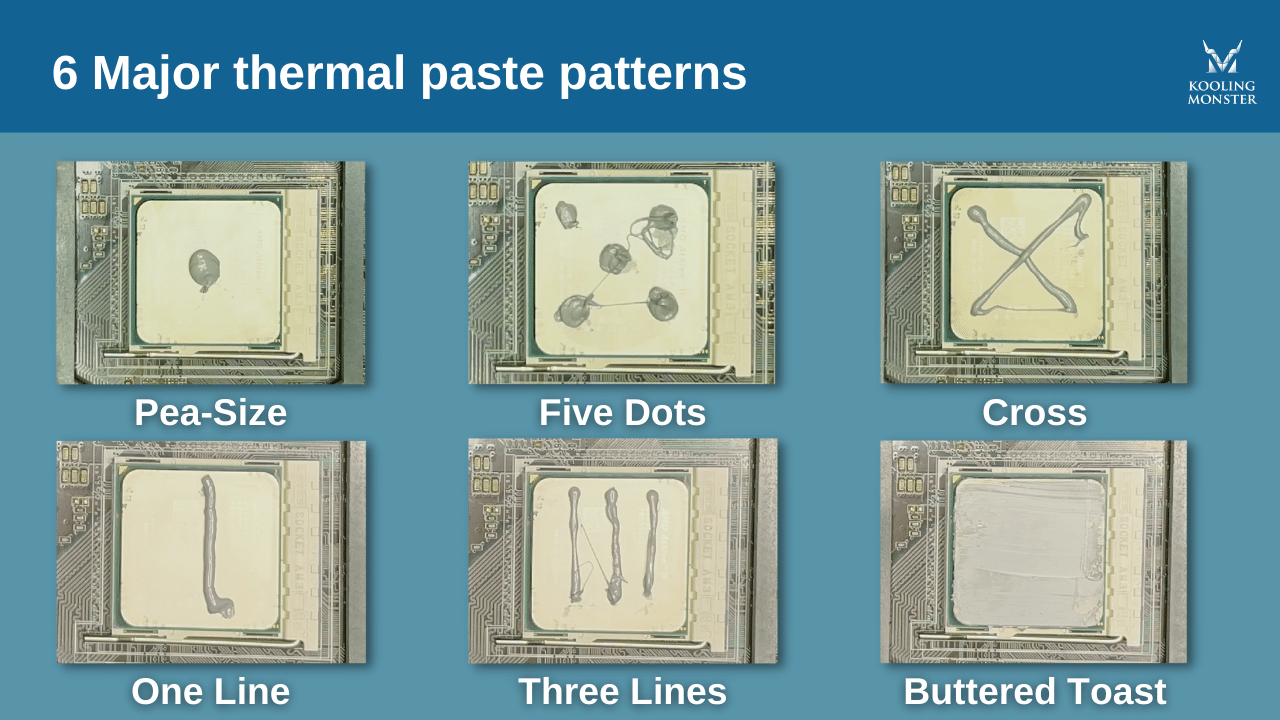
Let’s talk about thermal paste patterns. Besides the basic “one dot” or “pea” method, there are 5 major patterns that are most-often used to apply thermal paste to the CPU.
1. Pea-size Method (One Dot Method)
As previously mentioned, the “One Dot” or “Pea” method is the most basic pattern used to apply thermal paste. This pattern makes sure the thermal paste is applied to the most important part of the CPU and reduces the risk of it spilling over the edges. Many pre-builds and manufactured electronics will use this method as it is safe and reliable.
2. Five Dots Method
The “Five Dots” method is a variation on the previous pattern as it applies 5 dots evenly to the CPU. This is the recommended method for beginners as it evenly distributes thermal paste to most of the CPU, including the middle, and also has a low risk of spillage. It is also AMD’s recommended pattern for their RYZEN chips.
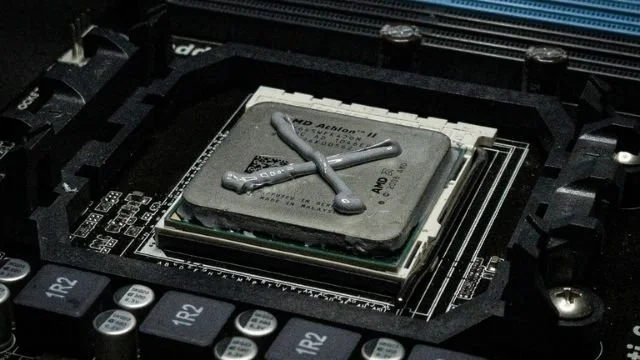
3. Cross Method
As you can see, the “Cross” method is similar to the previous one in that it distributes the thermal paste to the corners of the CPU, as well as the middle – which suggests better heat transfer. The difference here being is that when using lines instead of dots, the risk of spillage increases. This is also a go-to method for beginners.
4. One Line Method
This method is fairly simple – it relies mostly on the pressure of the heatsink to “spread” the line in both directions, insuring better coverage.
5. Three-Line Method
Like the last one, but three. Again, slightly better coverage.
6. Buttered Toast Method
This pattern has recently been gaining more and more traction as the go-to method for PC builders. Why? Well, take a look. In our previous patterns, we relied on the pressure of the heatsink to spread our thermal paste. With this method, we make sure that the thermal paste is touching every spot on the CPU, effectively ensuring that we’re getting maximum heat transfer. However, the risk of spillage becomes higher. If you’re trying this out, make sure your thermal paste is not electrically-conductive.
Now, here’s the kicker – as long as the paste can be applied thin and even, it doesn’t really matter.
Well, it does… sort of. Essentially, as long as your thermal paste layer is thin and is touching the entire CPU , most of the heat transfer is already achieved.
The comparison can be seen in our thermal paste pattern analysis. By using the proper amount of thermal paste, the temperature differences are negligible. However, that is not an excuse to be lazy with your thermal paste. Good application with any of the above methods will result in better temperatures than a flawed application.
It is worth mentioning that some thermal paste products are very hard to spread or too stiff to spread evenly, resulting in a bad performance in certain patterns. In those scenarios, we would recommend using the buttered toast method.
Best way to apply thermal paste
Just because there’s no real “best” pattern doesn’t mean there isn’t a best way to apply the above patterns. It’s important to make sure you apply new thermal paste correctly as that can also affect how well it performs.
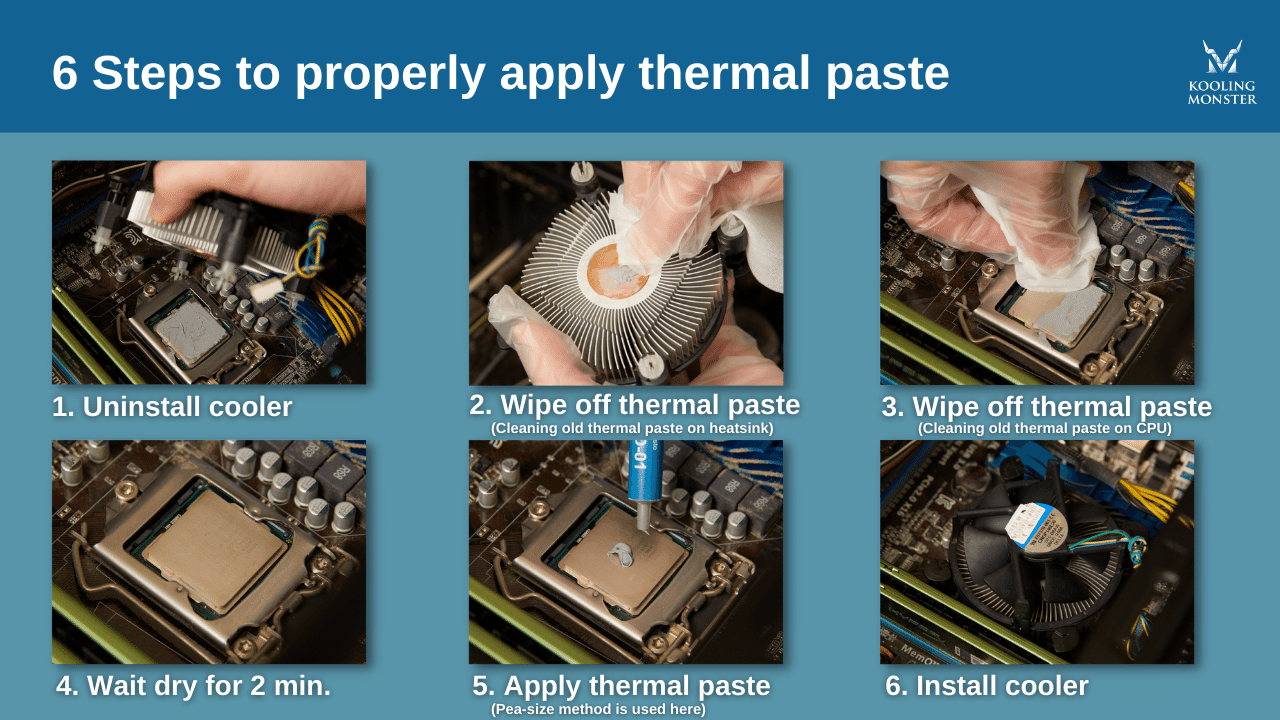
1. Take off the cooler (this can be your stock heatsink, your aircooling heatsink, or if you’re using watercooling it would be the waterblock)
2. Use an alcohol + cotton swab + paper towel combo to clean the old thermal paste off your heatsink
***or just make your life easier and use the cleaning wipe and gloves (can be found in KOLD-01 Thermal Paste Package or KLEAN-01 Thermal Paste Remover Package) – the wipe is made with a special formula to remove the driest thermal paste without leaving any lint to clean up and the gloves protect your hands from the chemicals.
3. Use an alcohol + cotton swab + paper towel combo (or thermal paste remover) to clean the old thermal paste off your CPU
4. Wait 2 minutes for the surfaces to dry
5. Use any of the patterns mentioned above and apply the thermal paste onto the CPU ONLY
6. Reinstall your heatsink by carefully placing it on top of the CPU and tightening the screws (Check the area around where the CPU and heatsink meet for any spillage and use a paper towel (or our specialty wipes) to clean it up)
How much thermal paste do I need?
At this point you know what patterns you can use and how to physically perform the process, but there’s still one thing missing: how much? Even the best pattern and the most precise application go to waste if an entire tube of thermal paste is left spilling out onto your motherboard.
The short answer is: it depends. Processors come in different sizes so you need to first check the dimensions of your CPU. However, the rule of thumb (and what Intel recommends) is about a pea-size amount (0.3-0.4ml) for a 40mmx40mm processor – just like the “One Dot” pattern. This gets a little bit harder to gauge when you move into other patterns like the cross (above).
In the end, the best way to gauge how much you need is to also just use common sense. Ask yourself: if I press down on this, will it go over the edges? If so, then that’s probably too much. (Learn more about how much thermal paste should you use?)
How often should you replace thermal paste?

You’ve chosen a pattern, determined the amount, gone through the steps and your computer is running like new – but you can’t help thinking: will I have to do this again?
The answer is yes. However, this also depends on a few factors, including:
· How you use your computer
· Your computer’s environment
· The quality of your cooling system
Generally, thermal paste wears out faster when more heat is applied to it consistently. So, if you’re consistently overclocking your CPU to play Triple-A games at max settings, chances are you’ll be generating a lot of heat – which will wear down your thermal paste. But if you’re only using your computer for daily browsing or watching Youtube videos, your thermal paste will last you much longer.
Your computer’s environment refers to whether or not your room is physically hot and dusty. If your room is hot and dust builds up in your PC, that’ll only add to the heat it already produces – which will degrade your thermal paste.
Lastly – your cooling system. If the heat being transferred through the thermal paste isn’t being dissipated quickly enough, it’ll go back through the thermal paste into other components, causing the thermal paste to degrade faster.
If you’re noticing your PC heating up faster or running slower, that’s usually a sign to replace your thermal paste. But don’t worry, a good quality thermal paste can last on an CPU for 2 to 3 years while providing the same level of heat transfer.
Kooling Monster KOLD-01Thermal Paste uses no organic solvents – meaning it can last longer and perform better than other thermal pastes without drying out!
FAQ
Does thermal paste go directly on CPU?
Yes, thermal paste is applied directly onto the heat spreader (the metal top) of the CPU. It fills microscopic air gaps between the CPU and the heatsink or cooler to ensure optimal heat transfer.
Can you use CPU right after applying thermal paste?
Yes, you can use your CPU immediately after applying thermal paste. The paste will begin to spread and work effectively as soon as the system heats up. However, some pastes may take a few thermal cycles to reach optimal performance.
What is the best way to apply thermal paste to a CPU?
The best method involves applying a small, pea-sized amount of paste to the center of the CPU. When the heatsink is mounted, it will spread the paste evenly. It's crucial not to apply too much to prevent overflow, which could potentially damage your system.
How long should you wait to change thermal paste on CPU?
Generally, thermal paste should be changed every 3-5 years under normal conditions. However, system performance, operating conditions, and paste quality can affect this timeline. Monitor your CPU temperatures regularly ; if they start to rise, consider changing the paste sooner.
What happens if you don't apply thermal paste correctly?
Incorrectly applied thermal paste can lead to inefficient heat transfer , causing your CPU to run hotter than it should. Over time, this could result in thermal throttling, system instability, and potential damage to your CPU or other components due to overheating.

