
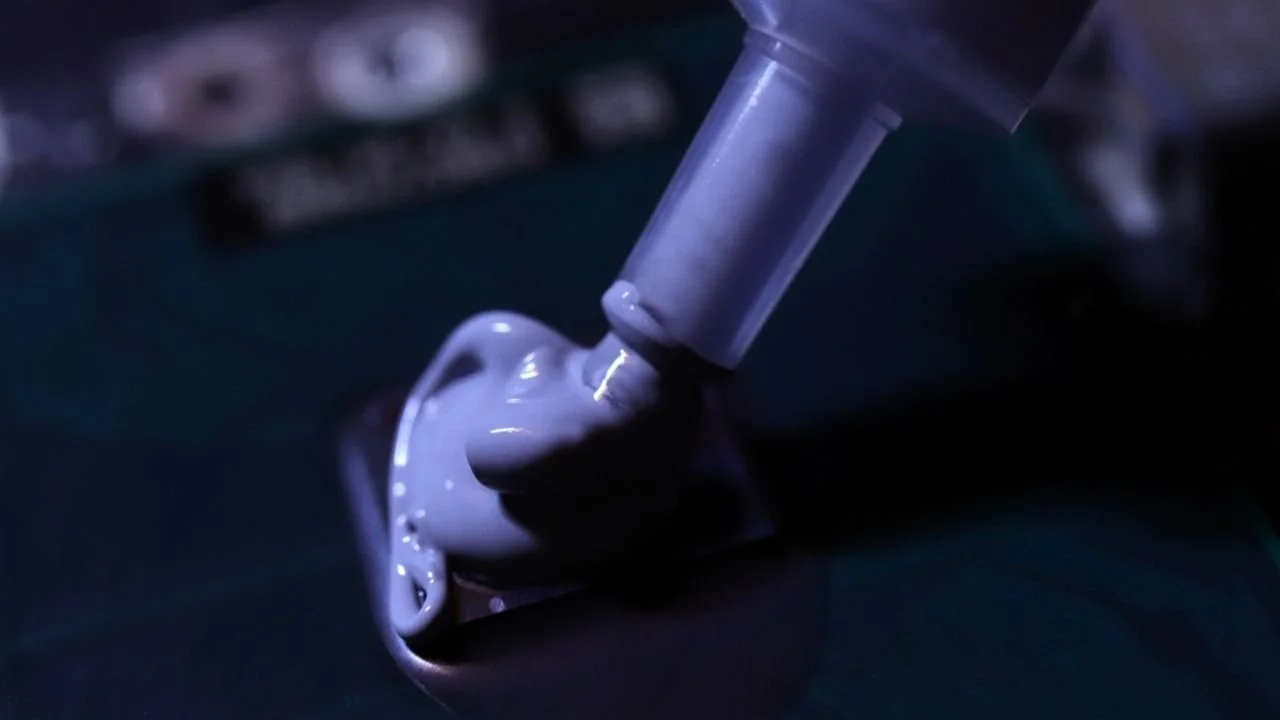
Most people use the cross method, the pea method, or the line method to spread thermal paste. Some PC-Builders have even made logos out of thermal paste (yes! It still works!). However, one application method that no one uses is the “whole tube” method. But you don’t even need the whole tube for it to be considered too much thermal paste – even applying half a tube is already enough to counteract your thermal paste’s thermal conductivity.
Keep reading and we’ll tell you what to do if that happens.
What if thermal paste spill over on CPU?

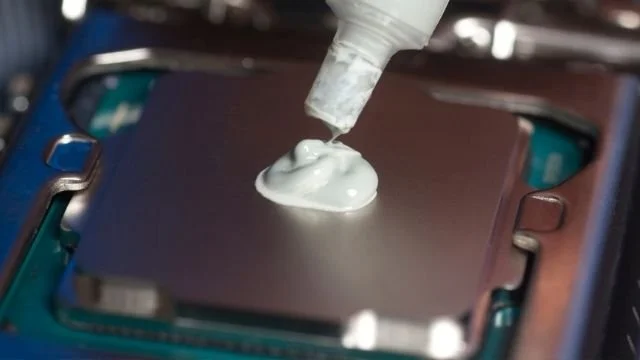
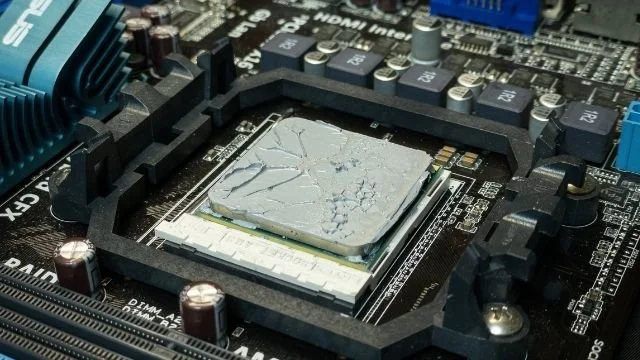
You’ll know immediately if you put too much thermal paste on your CPU – if you push down on the heatsink and globules pour over the sides. You may feel a small pang in the middle of your chest – “I did something wrong.” Don’t worry, you haven’t. Or maybe not just yet.
Thermal paste is usually not a danger to other components. Thermal paste itself is designed to be thermally conductive, not always electrically conductive – which is to say it doesn’t harm electronic components or interfere with the way electrons move between them. However, some pastes do. Liquid thermal pastes containing metals like silver are often thermally conductive as well as electrically conductive. So before you panic, check your thermal paste tube, box, or instructions to see whether or not its electrically conductive. An electrically conductive thermal paste might cause a motherboard or other electronic components to short-circuit, whereas a regular thermal paste will just cause a mess.
If you’ve already checked and made sure the thermal paste isn’t electrically conductive then congratulations! You still have a working computer! To celebrate, let’s clean up your non-electrically-conductive thermal paste.
For a small spillover, you will need:
· Paper towels
· Isopropyl alcohol (the higher % the better)
Fold the paper towel 3 times and dip it into the isopropyl alcohol. After that, gently wipe the thermal paste away to the nearest corner of the CPU/Heatsink and off the side. Be careful not to let any drip down into the components or the CPU.
To avoid more hassle, you can use Kooling Monster’s KLEAN-01 specialized thermal paste wipe. It comes pre-soaked with a special formula that easily wipes away any thermal paste, new or old. So that means no looking for paper towels and no figuring out if the alcohol in your liquor cabinet could work (spoiler: it can’t).
After wiping the thermal paste off, wait 2 minutes for the surfaces to dry and then you’re free to use your PC!
Is too much thermal paste bad?

“But maybe it’s good that the thermal paste is spilling off the sides.”
- Said nobody, ever.
Okay, so maybe that’s not the only point, but it is a good point. The above section illustrates first and foremost why too much thermal paste isn’t good – it spills. Thermal paste can spill and, depending on its conductivity profile, can possibly brick your PC. Even if it doesn’t, it can drip into the pins on your CPU and cause various malfunctions.
But what if it doesn’t drip?
Absolutely right – some thermal pastes are thick and don’t drip. They can be applied in a thick layer on top of the CPU, ensuring optimal heat transfer, right? Wrong. Unfortunately, when it comes to computers, the peanut butter sandwich strategy for layering doesn’t work. A thick layer is not always better.
Firstly, if you are able to spread your thermal paste in a thick layer without it spilling, you should find a new thermal paste. Thermal paste that isn’t greasy usually means its either of bad quality or expired (or both). Thermal paste should be greasy in order to fill the microscopic gaps on the surface of the IHS and the heatsink. If it can’t do that, it can’t do its second job of transferring heat correctly.
Secondly, if you do manage to spread a good-quality thermal paste on in a thick layer, that doesn’t let it do its jobs either. This time around, it might be able to enter the gaps but then the heat has to travel extra distance to reach the heatsink – effectively negating the benefits of the thermal paste.
This is because of something called thermal resistance which is a measure of how efficiently a substance is able to transfer heat from one medium to another. A key factor that determines the thermal resistance of thermal paste is how thin the layer is. Recall that thermal paste’s roll is a gap filler to replace the air trapped in the microscopic and macroscopic pockets which can exist on the surfaces of both the IHS and the heatsink. It doesn’t take a significant amount to fill gaps. Once the gaps are completely filled, each millimeter of excess paste will cause extra resistance to the heat transfer and more heat to be generated.
If the cleanup didn’t convince you, maybe the science did – too much thermal paste is not a good thing.
How to know if too much thermal paste is applied?
Not everyone can eyeball 0.3ml of thermal paste. Especially after the computer is already built, assembled, and running. Let’s hope it doesn’t get to that point.
When you’re applying thermal paste, no matter which method you use, ensure that you’re squeezing the tube only gentle enough for a thin line to come out. If you’re using the pea/dot method, this is much easier. Just make sure it looks like a pea. (Learn more about how much thermal paste you should use)
After you’ve finished applying and have installed the heatsink, carefully look around the edges for any signs of spillage. Try shifting your case vertically and waiting a few minutes as well then checking again to be sure. If there are signs of spillage, wipe them off with the process shown above. If any thermal paste got into your CPU’s pins, check our article - Thermal paste on CPU pin? How to remove thermal paste from CPU socket?.
After your build is complete, there could still be signs of using too much thermal paste. Remember that if you spread thermal paste too thick, this could actively work against the heat transfer taking place. So one telltale sign of too much thermal paste is a high CPU temperature. The heat isn’t able to efficiently transfer into the heatsink, so it remains in the CPU. That leads to the next telltale sign – a slowdown in processing power. Having to deal with the excess heat will cause your CPU to slow down thereby causing lag or irregular performance. (Learn more about How to check CPU temperature and why is it important?)
Let’s hope it doesn’t come to that. Better than hope, let’s be sure – check out our article here on How to apply thermal paste to a CPU? [2026 step-by-step beginner guide].
How much thermal paste should I use?
As we previously mentioned, not everybody can eyeball 0.3ml, which just so happens to be the ideal amount of thermal paste to use on a CPU. However, CPU sizes vary so this depends on the size of the CPU. Generally, for a 40mm by 40mm CPU 0.3ml-0.4ml is enough. If you’re unsure, you can always consult with the instructions that come with your processor. AMD and Intel both have their preferred methods and amounts which are a good go-to for beginners and experts alike. You can always check out our estimation guide for more detail.
If you’re a little more curious, feel free to experiment with different patterns of methods and reapply if it happens to be too much.
Frequently Asked Questions
-
Is it OK if thermal paste overflows?
Overflowing thermal paste can be problematic, especially if it's conductive and makes contact with motherboard components. It can potentially cause short-circuits and damage. Therefore, it's crucial to use an appropriate amount - typically a pea-sized dollop in the middle of the CPU.
-
How do you remove too much thermal paste?
To remove excess thermal paste, carefully wipe it off using a non-abrasive, lint-free cloth or wipe, often lightly moistened with isopropyl alcohol. Always power down and disconnect the system first, and be careful not to let the paste get onto the motherboard or other components.Kooling Monster also offers quality wiping paper that can effectively solve this problem.
-
How long does it take for thermal paste to harden?
Most thermal pastes don't harden completely, but they will thicken and settle over time. This process, known as curing, can take several hours to a few days depending on the specific product. Some high-performance pastes may have a longer curing time. Kooling Monster offers premium thermal conductive paste available for purchase.
-
How long should you wait to change thermal paste on CPU?
Typically, thermal paste should be replaced every 3-5 years under normal operating conditions. However, if the CPU temperatures start to rise significantly under load or the system starts to shut down due to overheating , it might be time to change the thermal paste sooner.
![How to Apply Thermal Paste to a CPU? [2026 Step-by-Step Beginner Guide]](/_next/image?url=%2Fimages%2Fscraped%2F7f0f852b1856.webp&w=3840&q=75)
